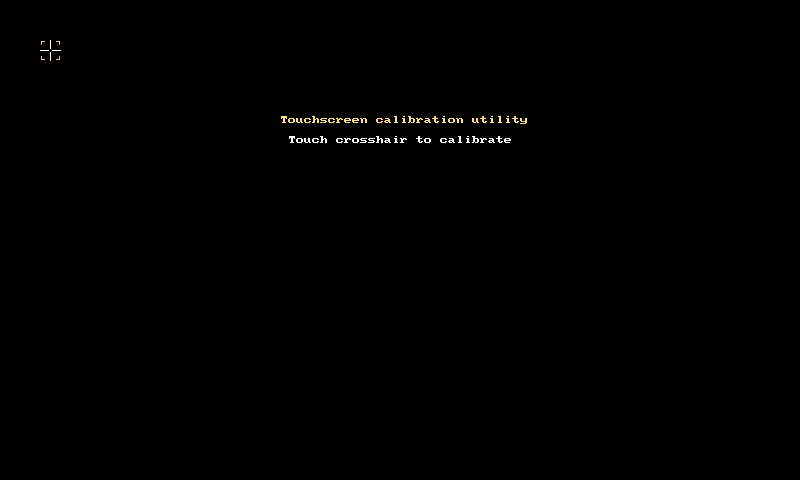
ts_calibrate유틸리티는 tslib에 포함된 터치스크린의 보정을 제공하는 tool이다. 싱글터치 스크린을 보정하고 그 보정값을 /etc/pointercal에 설정한다.
tslib가 설치되어 있다면 기본 tool의 실행은 다음과 같은 명령으로한다.

이제 이 기능을 QML아이템으로 사용할 수 있도록 구현하는 방법을 알아보고자 한다.
기본 (보정)로직은 기존 ts_calibrate의 소스코드를 응용하는 것인데 저장소를 통해 소스코드를 얻을 수 있다.
핵심적인 코드는 fbutils-linux.c, testutils.c, ts_calibrate_common.c 에 있다. 십자 모양을 그리고 터치입력을 기다리고 입력이 완료되면 보정을 수행한다. (화면에 십자모양을 나타내는 몇가지 방법이 있고 fbutils-linux는 리눅스 프레임버퍼를 사용한다.)
이 핵심적인 기능을 하는 QML아이템을 구현하고 필요한 곳에서 이 아이템을 사용하면 된다.
새로운 QML아이템을 C++로 구현하기위해 QQuickPaintedItem을 상속받는다.
TSCalibration.h
#include <QObject>
#include <QtQuick>
#include <tslib.h>

class TSCalibaration : public QQuickPaintedItem
{
  Q_OBJECT

public:
  TSCalibaration();
  virtual ~TSCalibaration() override;

private:
  void paint(QPainter *painter) override;

...

};
paint함수는 QML Scene Graph에서 호출되며 항목의 내용을 로컬 좌표로 그린다.
QML 씬 그래프는 두 개의 개별 스레드를 사용하며, 주 스레드는 이벤트 처리 또는 애니메이션 업데이트와 같은 작업을 수행하고 두 번째 스레드는 실제 OpenGL 렌더링을 수행한다. 결과적으로 paint()는 메인 GUI 스레드에서 호출되는 것이 아니라 렌더러 스레드에서 호출되며 paint()가 호출되는 순간 GUI 스레드가 차단되므로 스레드로부터 안전하다.
이 함수에서 십자 모양을 그리도록 재정의하면 될 것이다.
그리고 모양이나 크기가 변경된 경우와 같이 항목을 다시 그려야 할 때 update()를 호출하면 그리기를 예약할 수 있다.
생성자에서는 스크린의 가로, 세로 크기 구하고 십자 모양(보정 기준 포인트)을 그릴 포인트 목록을 만든다.
TSCalibration.cpp
#include <QGuiApplication>

#include <unistd.h>
#include <fcntl.h>
#include <QTimer>

#include "TSCalibration.h"

TSCalibaration::TSCalibaration()
  : xres(0), yres(0), m_index(0)
{
  auto screen = qApp->primaryScreen();
  QRect geometry = screen->geometry();

  xres = geometry.width();
  yres = geometry.height();

  ts = ts_setup(nullptr, 0);
  if (!ts) {
    perror("ts_setup");
    exit(1);
  }

  tsPoints.append(QPoint(50, 50));
  tsPoints.append(QPoint(xres - 50, 50));
  tsPoints.append(QPoint(xres - 50, yres - 50));
  tsPoints.append(QPoint(50, yres - 50));
  tsPoints.append(QPoint(xres/2, yres/2));

  connect(this, SIGNAL(crossDrawn()), this, SLOT(onCrossDrawn()));
}
paint함수에서는 포인트 목록에서 차례대로 십자 모양을 그리도록한다.
void TSCalibaration::paint(QPainter* painter)
{
  QBrush brush(QColor("#000000"));
  painter->setBrush(brush);

  painter->setRenderHint(QPainter::Antialiasing);
  painter->fillRect(0, 0, boundingRect().width(), boundingRect().height(), brush);

  auto index = this->index();
  if(index > -1 && index < TS_POINT_SAMPLE_MAX){
    painter->setPen(Qt::white);

    auto x = tsPoints.at(index).x();
    auto y = tsPoints.at(index).y();

    //cross
    painter->drawLine(x - 10, y, x - 2, y);
    painter->drawLine(x + 2, y, x + 10, y);
    painter->drawLine(x, y - 10, x, y - 2);
    painter->drawLine(x, y + 2, x, y + 10);

    painter->drawLine(x - 6, y - 9, x - 9, y - 9);
    painter->drawLine(x - 9, y - 8, x - 9, y - 6);
    painter->drawLine(x - 9, y + 6, x - 9, y + 9);
    painter->drawLine(x - 8, y + 9, x - 6, y + 9);
    painter->drawLine(x + 6, y + 9, x + 9, y + 9);
    painter->drawLine(x + 9, y + 8, x + 9, y + 6);
    painter->drawLine(x + 9, y - 6, x + 9, y - 9);
    painter->drawLine(x + 8, y - 9, x + 6, y - 9);
  }
  emit crossDrawn();
}
이 아이템을 사용할 수 있도록 등록해준다.
#include <QtQml>
#include "TSCalibration.h"

int main(int argc, char *argv[])
{
...
  qmlRegisterType<TSCalibaration>("TSCalibration", 1, 0, "TSCalibration");
...
  return app.exec();
}
컴파일전에 tslib 라이브러리 및 헤더파일의 위치를 컴파일러에게 알려줄 필요가 있다.
이제 어떤 시점에 다음과 같은 QML아이템(TouchCalibration)을 보여주면 될 것이다.
TouchCalibration.qml
import QtQuick 2.5
import TSCalibration 1.0

Item {
    anchors.fill: parent

    MouseArea{
        anchors.fill: parent
    }

    TSCalibration {
        id: idTSCalibration
        anchors.fill: parent

        Text {
            id: idText
            color: "white"
            font.pixelSize: 15
            text: "Touch crosshair to calibrate"
            anchors.horizontalCenter: parent.horizontalCenter
            anchors.top: parent.top
            anchors.topMargin: 100
        }

        onCalibrationFinished:{
            // do something
        }
    }
}
이후 보정된 값을 반영하기 위해선 tslib를 다시 로드해야 할 필요가 있다. 즉, /etc/pointercal에 저장된 값을 tslib가 다시 읽어야 한다는 의미이다.