먼저 Python 및 PySide2등이 설치 되어 있어야한다. 다음의 Qt for Python 공식문서에 설치방법등이 자세히 나와있다.
https://doc.qt.io/qtforpython/contents.html
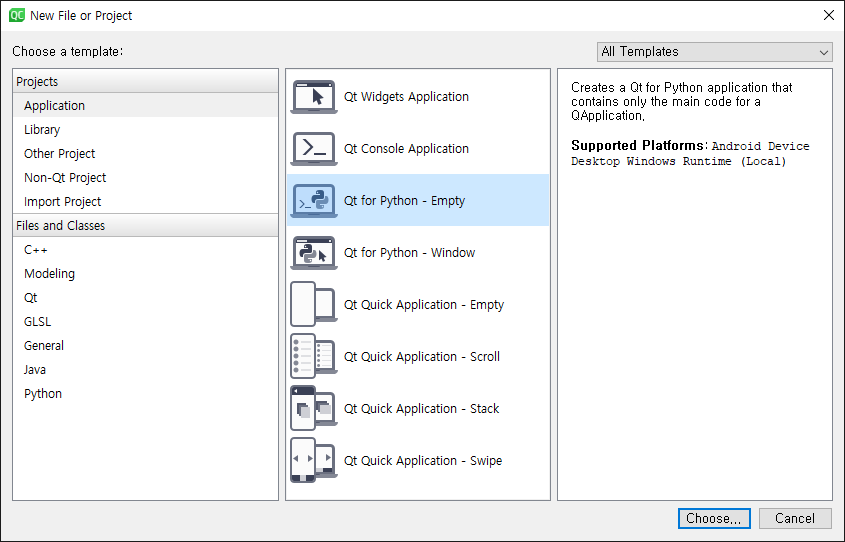
Qt Creator에서 Qt for Python - Empty를 선택

QML예제 소스코드는 특별히 다르지않다.
Window.qml
import QtQuick 2.11
import QtQuick.Window 2.11

Window {
    title: "PySide & QML"
    width: 320
    height: 240
    visible: true

    Column{
        anchors.centerIn: parent
        Image{
            source: "Py-128.png"
            anchors.horizontalCenter: parent.horizontalCenter
        }

        Text {
            id: hello
            text: qsTr("PySide2")
            font.pixelSize: 25
            horizontalAlignment: Text.AlignHCenter
            anchors.horizontalCenter: parent.horizontalCenter
        }
    }
}
PySide2 관련 모듈을 import 시켜주고 QmlEngine객체 생성 후 Window.qml을 로드한다. (C++과 다르지 않다.)
main.py 예제 코드
# This Python file uses the following encoding: utf-8
import sys
from os.path import *
from PySide2.QtCore import QObject
from PySide2.QtWidgets import QApplication
from PySide2.QtQml import *

if __name__ == "__main__":
    app = QApplication([])
    engine = QQmlApplicationEngine()
    dir = dirname(__file__)
    qmlFile = join(dir, 'Window.qml')
    engine.load(abspath(qmlFile))
    sys.exit(app.exec_())
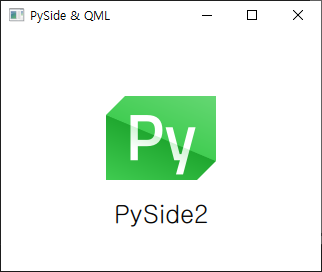
Qt Creator의 Run을 클릭하면 윈도우가 보여진다.

| 번호 | 제목 | 글쓴이 | 날짜 | 조회 수 |
|---|---|---|---|---|
| 4 |
pydbus 바인딩을 이용하여 서비스 데몬과 D-Bus통신
| makersweb | 2018.03.12 | 12417 |
| 3 |
명령어 한줄로 내컴퓨터를 웹서버로
| 운영자 | 2019.01.25 | 9974 |
| » |
Qt For Python(PySide2) QML 프로젝트 예제
| makersweb | 2019.10.17 | 16654 |
| 1 | pybind11 에 대해서 | makersweb | 2023.07.23 | 10579 |