한국어
Qt
 

ShaderEffect을 이용하면 다양한 그래픽효과를 구현할 수 있다. 이를 이용해서 버튼의 클릭 효과를 구현해본다.
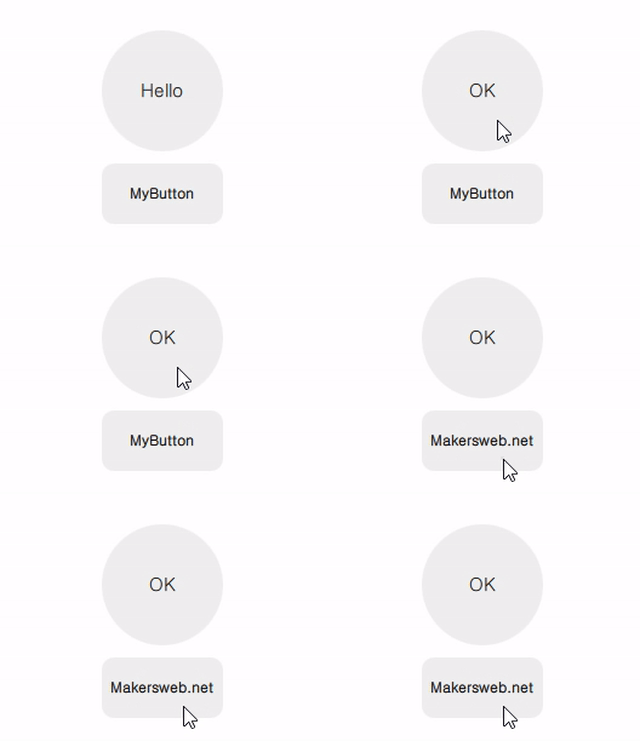
ShaderEffectQmlButton.gif


MyButton.qml

import QtQuick 2.2

Item{

    signal clicked()
    signal pressed()

    property alias radius: base.radius

    Rectangle{
        id: base

        radius: 10
        anchors.fill: parent
        color: "#10000000"
    }

    ShaderEffect {
        id: shaderEffect1
        opacity: 1
        anchors.fill: parent

        property variant source: effectSource

        ShaderEffectSource {
            id: effectSource
            sourceItem: base
            hideSource: true
        }

        property point normTouchPos
        property real widthToHeightRatio: height / width
        // animated uniform property
        property real spread: 0

        ParallelAnimation {
            id: touchStartAnimation
            UniformAnimator {
                uniform: "spread";
                target: shaderEffect1
                from: 0; to: 1
                duration: 300
                easing.type: Easing.InQuad
            }
            onStopped: {
                // animation stopped
                if(!touch.pressed){
                    if(shaderEffect1.spread != 0)
                        shaderEffect1.spread = 0
                }
            }
        }

        fragmentShader: "
            uniform sampler2D source;
            varying mediump vec2 qt_TexCoord0;
            uniform lowp float qt_Opacity;
            uniform mediump vec2 normTouchPos;
            uniform mediump float widthToHeightRatio;
            uniform mediump float spread;

            void main() {
                mediump float radius = (0.5 + abs(0.5 - normTouchPos.x)) * 1.0 * spread;
                mediump vec2 circleCenter =
                    normTouchPos + (vec2(0.5) - normTouchPos) * radius * 2.0;

                mediump float circleX = (qt_TexCoord0.x - circleCenter.x);
                mediump float circleY = (qt_TexCoord0.y - circleCenter.y) * widthToHeightRatio;

                highp vec4 color = texture2D(source, qt_TexCoord0);

                lowp vec4 tapOverlay =
                    color * step(circleX*circleX + circleY*circleY, radius*radius);
                gl_FragColor = (color + tapOverlay) * qt_Opacity;
            }
        "

        function touchStart(x, y) {
            normTouchPos = Qt.point(x / width, y / height)
            touchStartAnimation.start()
        }

        function touchStop() {
            touchStartAnimation.stop()
        }
    }

    MouseArea{
        id: touch
        anchors.fill: parent
        onPressed: {
            shaderEffect1.touchStop()
            shaderEffect1.touchStart(mouseX, mouseY)
        }
        onClicked: {
            parent.clicked()
            shaderEffect1.spread = 0
        }
        onExited: {
            shaderEffect1.spread = 0
        }
    }
}


다음은 구현된 MyButton을 사용하는 방법이다.

main.qml

import QtQuick 2.2
import QtQuick.Window 2.2
import QtQuick.Layouts 1.3

Window {
    visible: true
    width: 320
    height: 240
    title: qsTr("ShaderEffect Custom Button")

    ColumnLayout{
        anchors.centerIn: parent
        spacing: 10

        MyButton{
            width: 100
            height: 100
            radius: 50
            Layout.alignment: Qt.AlignHCenter

            Text {
                id: button0_text
                anchors.centerIn: parent
                text: qsTr("Hello")
                font.pixelSize: 15
            }

            onClicked: {
                if(button0_text.text == "Hello")
                    button0_text.text = "OK"
                else{
                    button0_text.text = "Hello"
                }
            }
        }

        MyButton{
            width: 100
            height: 50
            Layout.alignment: Qt.AlignHCenter

            Text {
                id: button1_text
                anchors.centerIn: parent
                text: qsTr("MyButton")
                font.bold: true
            }

            onClicked: {
                if(button1_text.text == "MyButton")
                    button1_text.text = "Makersweb.net"
                else{
                    button1_text.text = "MyButton"
                }
            }
        }
    }
}


번호 제목 글쓴이 날짜 조회 수
공지 Qt프로그래밍(QtQuick) Beginner를 위한 글 읽는 순서 운영자 2019.01.05 85903
139 응용프로그램 자동실행 설정 (on Windows) makersweb 2021.05.08 563
138 Qt 6 에서 프로퍼티 바인딩 makersweb 2021.04.03 770
137 QML과 JavaScript 의 숫자 관련 내장된 함수 makersweb 2021.03.28 1396
136 Qt 5 코드를 Qt 6로 포팅하기 위해 도움이 되는 Clazy Framework file makersweb 2021.03.01 921
135 C++로 작성한 클래스를 QML에서 생성 file makersweb 2021.02.10 5285
134 Qt MQTT의 pus/sub 튜토리얼 file makersweb 2021.02.06 1639
133 Qt 를 사용하거나 기반으로 하는 응용프로그램 file makersweb 2021.01.30 3801
132 Loader를 사용하여 동적으로 QML 로드 makersweb 2021.01.19 1811
131 QThread 및 QMutex 예제 makersweb 2021.01.12 1351
130 그래픽 소프트웨어에서 디자인 내보내기 (Exporting Designs from Graphics Software) j2doll 2020.12.25 413
129 Qt5Compat 라이브러리를 사용하여 Qt5에서 Qt6로 포팅 [2] makersweb 2020.12.05 674
128 Qt Quick Controls 2에 네이티브 데스크탑 스타일 추가 file makersweb 2020.11.23 487
127 QML 바인딩 끊김 진단 makersweb 2020.11.08 910
126 QML과 코루틴(Coroutines) makersweb 2020.11.03 578
125 Qt 6의 비동기 API makersweb 2020.10.19 1201
124 QRandomGenerator 클래스를 사용하여 난수(random values) 생성 makersweb 2020.10.17 1570
123 Qt 6에서 QList 변경사항 makersweb 2020.10.08 975
122 Qt 6.0의 개발 호스트 및 대상 플랫폼 makersweb 2020.09.16 976
121 main함수 명령줄 옵션 해석 makersweb 2020.09.01 2232
120 UI 폼(Form)작성 시 탭 순서(Tab Order) 설정 file makersweb 2020.08.24 2778