한국어
Qt
 

ShaderEffect을 이용하면 다양한 그래픽효과를 구현할 수 있다. 이를 이용해서 버튼의 클릭 효과를 구현해본다.
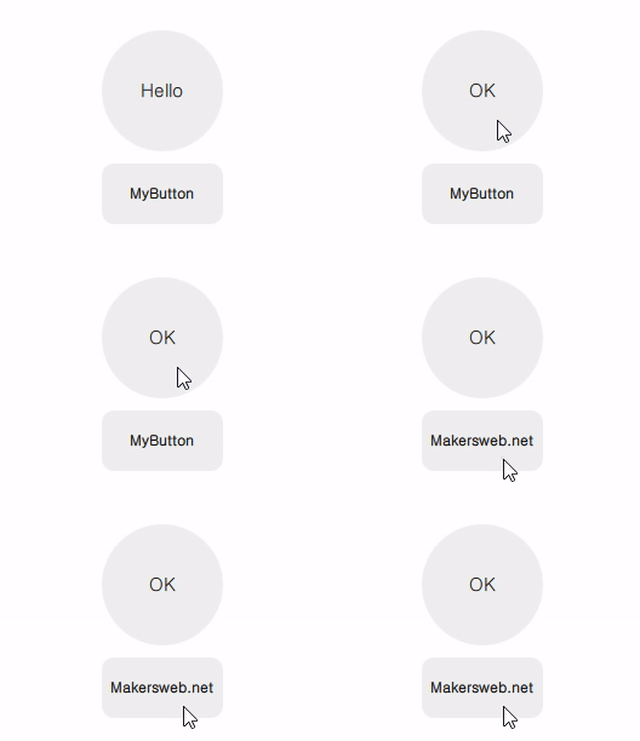
ShaderEffectQmlButton.gif


MyButton.qml

import QtQuick 2.2

Item{

    signal clicked()
    signal pressed()

    property alias radius: base.radius

    Rectangle{
        id: base

        radius: 10
        anchors.fill: parent
        color: "#10000000"
    }

    ShaderEffect {
        id: shaderEffect1
        opacity: 1
        anchors.fill: parent

        property variant source: effectSource

        ShaderEffectSource {
            id: effectSource
            sourceItem: base
            hideSource: true
        }

        property point normTouchPos
        property real widthToHeightRatio: height / width
        // animated uniform property
        property real spread: 0

        ParallelAnimation {
            id: touchStartAnimation
            UniformAnimator {
                uniform: "spread";
                target: shaderEffect1
                from: 0; to: 1
                duration: 300
                easing.type: Easing.InQuad
            }
            onStopped: {
                // animation stopped
                if(!touch.pressed){
                    if(shaderEffect1.spread != 0)
                        shaderEffect1.spread = 0
                }
            }
        }

        fragmentShader: "
            uniform sampler2D source;
            varying mediump vec2 qt_TexCoord0;
            uniform lowp float qt_Opacity;
            uniform mediump vec2 normTouchPos;
            uniform mediump float widthToHeightRatio;
            uniform mediump float spread;

            void main() {
                mediump float radius = (0.5 + abs(0.5 - normTouchPos.x)) * 1.0 * spread;
                mediump vec2 circleCenter =
                    normTouchPos + (vec2(0.5) - normTouchPos) * radius * 2.0;

                mediump float circleX = (qt_TexCoord0.x - circleCenter.x);
                mediump float circleY = (qt_TexCoord0.y - circleCenter.y) * widthToHeightRatio;

                highp vec4 color = texture2D(source, qt_TexCoord0);

                lowp vec4 tapOverlay =
                    color * step(circleX*circleX + circleY*circleY, radius*radius);
                gl_FragColor = (color + tapOverlay) * qt_Opacity;
            }
        "

        function touchStart(x, y) {
            normTouchPos = Qt.point(x / width, y / height)
            touchStartAnimation.start()
        }

        function touchStop() {
            touchStartAnimation.stop()
        }
    }

    MouseArea{
        id: touch
        anchors.fill: parent
        onPressed: {
            shaderEffect1.touchStop()
            shaderEffect1.touchStart(mouseX, mouseY)
        }
        onClicked: {
            parent.clicked()
            shaderEffect1.spread = 0
        }
        onExited: {
            shaderEffect1.spread = 0
        }
    }
}


다음은 구현된 MyButton을 사용하는 방법이다.

main.qml

import QtQuick 2.2
import QtQuick.Window 2.2
import QtQuick.Layouts 1.3

Window {
    visible: true
    width: 320
    height: 240
    title: qsTr("ShaderEffect Custom Button")

    ColumnLayout{
        anchors.centerIn: parent
        spacing: 10

        MyButton{
            width: 100
            height: 100
            radius: 50
            Layout.alignment: Qt.AlignHCenter

            Text {
                id: button0_text
                anchors.centerIn: parent
                text: qsTr("Hello")
                font.pixelSize: 15
            }

            onClicked: {
                if(button0_text.text == "Hello")
                    button0_text.text = "OK"
                else{
                    button0_text.text = "Hello"
                }
            }
        }

        MyButton{
            width: 100
            height: 50
            Layout.alignment: Qt.AlignHCenter

            Text {
                id: button1_text
                anchors.centerIn: parent
                text: qsTr("MyButton")
                font.bold: true
            }

            onClicked: {
                if(button1_text.text == "MyButton")
                    button1_text.text = "Makersweb.net"
                else{
                    button1_text.text = "MyButton"
                }
            }
        }
    }
}


번호 제목 글쓴이 날짜 조회 수
공지 Qt프로그래밍(QtQuick) Beginner를 위한 글 읽는 순서 운영자 2019.01.05 86142
139 멀티 스레드환경, 스레드에 안전한 이벤트처리 makersweb 2016.10.27 5043
138 C++로 구현된 모델을 QML의 ListView에서 참조 file makersweb 2019.09.07 4935
137 Qt 멀티 스레드 프로그래밍 시 유의해야 할 몇 가지 makersweb 2020.01.13 4889
136 Qml 기본 컴포넌트 강좌 (3) - 배치(positioning) 컴포넌트 file 운영자 2019.02.10 4888
135 QNetworkAccessManager를 통해 HTTP POST 하는 예제 makersweb 2019.01.17 4798
134 Windows에서 Qt D-Bus를 사용하여 프로세스간 통신(IPC) file makersweb 2019.05.02 4505
133 Qt응용프로그램 실행 시 콘솔창(터미널)같이 띄우기 file makersweb 2019.01.16 4499
132 라즈베리파이4에 대한 Qt 5.14.1 크로스컴파일 [1] file makersweb 2020.02.12 4455
131 QML에서 동적으로 텍스트 다국어 처리 file makersweb 2018.11.04 4229
130 Qt기반의 오픈소스 프로젝트들 - 2 운영자 2019.07.21 4017
129 QPA 플러그인과 EGLFS file makersweb 2017.11.21 3935
128 열거형(enum)을 QML에서 사용하는 방법과 문자열(QString)로 얻기 makersweb 2019.08.20 3897
127 QML에서 앵커(anchors)로 위치 지정 file makersweb 2021.10.05 3871
126 Qt 를 사용하거나 기반으로 하는 응용프로그램 file makersweb 2021.01.30 3843
125 Qt 3D Studio 시작하기 file makersweb 2018.01.11 3829
124 Qt Logging Rule, Qt 프레임워크 로그 출력 makersweb 2017.01.13 3713
123 Qml에서 키보드 입력 이벤트 핸들링 file makersweb 2018.08.09 3606
122 Qt Bluetooth를 이용한 시리얼(Serial) 통신 file makersweb 2019.02.17 3587
121 Qt Version확인 방법 makersweb 2018.03.29 3527
120 QML, 이미지, 폰트등을 바이너리 리소스로 만들기 makersweb 2019.06.24 3525