한국어
Qt
 

ShaderEffect을 이용하면 다양한 그래픽효과를 구현할 수 있다. 이를 이용해서 버튼의 클릭 효과를 구현해본다.
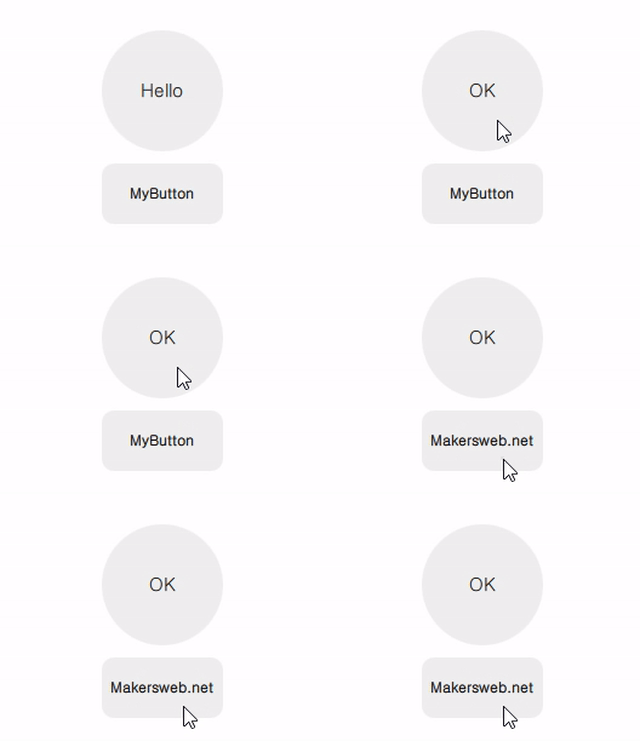
ShaderEffectQmlButton.gif


MyButton.qml

import QtQuick 2.2

Item{

    signal clicked()
    signal pressed()

    property alias radius: base.radius

    Rectangle{
        id: base

        radius: 10
        anchors.fill: parent
        color: "#10000000"
    }

    ShaderEffect {
        id: shaderEffect1
        opacity: 1
        anchors.fill: parent

        property variant source: effectSource

        ShaderEffectSource {
            id: effectSource
            sourceItem: base
            hideSource: true
        }

        property point normTouchPos
        property real widthToHeightRatio: height / width
        // animated uniform property
        property real spread: 0

        ParallelAnimation {
            id: touchStartAnimation
            UniformAnimator {
                uniform: "spread";
                target: shaderEffect1
                from: 0; to: 1
                duration: 300
                easing.type: Easing.InQuad
            }
            onStopped: {
                // animation stopped
                if(!touch.pressed){
                    if(shaderEffect1.spread != 0)
                        shaderEffect1.spread = 0
                }
            }
        }

        fragmentShader: "
            uniform sampler2D source;
            varying mediump vec2 qt_TexCoord0;
            uniform lowp float qt_Opacity;
            uniform mediump vec2 normTouchPos;
            uniform mediump float widthToHeightRatio;
            uniform mediump float spread;

            void main() {
                mediump float radius = (0.5 + abs(0.5 - normTouchPos.x)) * 1.0 * spread;
                mediump vec2 circleCenter =
                    normTouchPos + (vec2(0.5) - normTouchPos) * radius * 2.0;

                mediump float circleX = (qt_TexCoord0.x - circleCenter.x);
                mediump float circleY = (qt_TexCoord0.y - circleCenter.y) * widthToHeightRatio;

                highp vec4 color = texture2D(source, qt_TexCoord0);

                lowp vec4 tapOverlay =
                    color * step(circleX*circleX + circleY*circleY, radius*radius);
                gl_FragColor = (color + tapOverlay) * qt_Opacity;
            }
        "

        function touchStart(x, y) {
            normTouchPos = Qt.point(x / width, y / height)
            touchStartAnimation.start()
        }

        function touchStop() {
            touchStartAnimation.stop()
        }
    }

    MouseArea{
        id: touch
        anchors.fill: parent
        onPressed: {
            shaderEffect1.touchStop()
            shaderEffect1.touchStart(mouseX, mouseY)
        }
        onClicked: {
            parent.clicked()
            shaderEffect1.spread = 0
        }
        onExited: {
            shaderEffect1.spread = 0
        }
    }
}


다음은 구현된 MyButton을 사용하는 방법이다.

main.qml

import QtQuick 2.2
import QtQuick.Window 2.2
import QtQuick.Layouts 1.3

Window {
    visible: true
    width: 320
    height: 240
    title: qsTr("ShaderEffect Custom Button")

    ColumnLayout{
        anchors.centerIn: parent
        spacing: 10

        MyButton{
            width: 100
            height: 100
            radius: 50
            Layout.alignment: Qt.AlignHCenter

            Text {
                id: button0_text
                anchors.centerIn: parent
                text: qsTr("Hello")
                font.pixelSize: 15
            }

            onClicked: {
                if(button0_text.text == "Hello")
                    button0_text.text = "OK"
                else{
                    button0_text.text = "Hello"
                }
            }
        }

        MyButton{
            width: 100
            height: 50
            Layout.alignment: Qt.AlignHCenter

            Text {
                id: button1_text
                anchors.centerIn: parent
                text: qsTr("MyButton")
                font.bold: true
            }

            onClicked: {
                if(button1_text.text == "MyButton")
                    button1_text.text = "Makersweb.net"
                else{
                    button1_text.text = "MyButton"
                }
            }
        }
    }
}


번호 제목 글쓴이 날짜 조회 수
공지 Qt프로그래밍(QtQuick) Beginner를 위한 글 읽는 순서 운영자 2019.01.05 86105
119 QOpenGLWidget 을 투명하게 적용 file makersweb 2020.02.05 1042
118 QML 전역 객체 (Global Object) file makersweb 2019.04.10 1054
117 안드로이드 가상장치 사용 file makersweb 2019.01.13 1074
» ShaderEffect QML Type을 이용한 버튼 클릭 효과 file makersweb 2020.05.22 1095
115 Qml에서 커튼효과 구현 예제 - Shader Effects file 운영자 2018.12.05 1114
114 Qt 스마트 포인터 (QSharedPointer, QScopedPointer, QPointer) makersweb 2022.08.18 1142
113 Qt 6의 비동기 API makersweb 2020.10.19 1210
112 재진입(Reentrancy) 및 스레드 안전성(Thread-Safety) makersweb 2020.04.19 1220
111 많은 리소스를 사용하는 Qt프로젝트에서 고려해봐야 할 qmake 옵션 makersweb 2019.10.11 1236
110 Widgets(C++) 기반의 기본 스타일을 Dark 테마 및 Material 디자인 스타일로 바꾸기 file makersweb 2023.01.28 1302
109 웹기반 Qt Design Viewer [2] file makersweb 2019.10.23 1308
108 QThread 및 QMutex 예제 makersweb 2021.01.12 1357
107 qInstallMessageHandler를 이용한 디버그 메세지 출력 제어하기 makersweb 2019.02.25 1359
106 tslib의 ts_calibrate를 응용해서 Qt로 터치보정기능 구현 file makersweb 2019.04.06 1370
105 Qbs에 대한 소개와 설치하는 방법 makersweb 2019.10.09 1370
104 싱글터치 스크린 및 임베디드 리눅스 기반에서 Qt 터치입력 makersweb 2018.12.24 1401
103 QML과 JavaScript 의 숫자 관련 내장된 함수 makersweb 2021.03.28 1404
102 Qt Quick 3D 소개 makersweb 2019.11.09 1448
101 QML에서 undefined를 확인하는 방법 makersweb 2017.11.29 1487
100 ApplicationWindow 와 메뉴바(MenuBar)구성 file makersweb 2020.01.04 1504