한국어
Qt
 

ShaderEffect을 이용하면 다양한 그래픽효과를 구현할 수 있다. 이를 이용해서 버튼의 클릭 효과를 구현해본다.
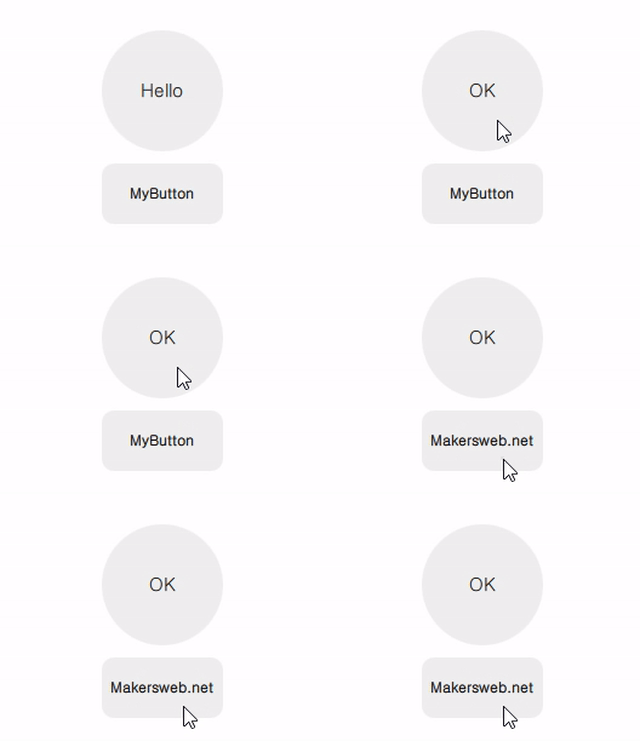
ShaderEffectQmlButton.gif


MyButton.qml

import QtQuick 2.2

Item{

    signal clicked()
    signal pressed()

    property alias radius: base.radius

    Rectangle{
        id: base

        radius: 10
        anchors.fill: parent
        color: "#10000000"
    }

    ShaderEffect {
        id: shaderEffect1
        opacity: 1
        anchors.fill: parent

        property variant source: effectSource

        ShaderEffectSource {
            id: effectSource
            sourceItem: base
            hideSource: true
        }

        property point normTouchPos
        property real widthToHeightRatio: height / width
        // animated uniform property
        property real spread: 0

        ParallelAnimation {
            id: touchStartAnimation
            UniformAnimator {
                uniform: "spread";
                target: shaderEffect1
                from: 0; to: 1
                duration: 300
                easing.type: Easing.InQuad
            }
            onStopped: {
                // animation stopped
                if(!touch.pressed){
                    if(shaderEffect1.spread != 0)
                        shaderEffect1.spread = 0
                }
            }
        }

        fragmentShader: "
            uniform sampler2D source;
            varying mediump vec2 qt_TexCoord0;
            uniform lowp float qt_Opacity;
            uniform mediump vec2 normTouchPos;
            uniform mediump float widthToHeightRatio;
            uniform mediump float spread;

            void main() {
                mediump float radius = (0.5 + abs(0.5 - normTouchPos.x)) * 1.0 * spread;
                mediump vec2 circleCenter =
                    normTouchPos + (vec2(0.5) - normTouchPos) * radius * 2.0;

                mediump float circleX = (qt_TexCoord0.x - circleCenter.x);
                mediump float circleY = (qt_TexCoord0.y - circleCenter.y) * widthToHeightRatio;

                highp vec4 color = texture2D(source, qt_TexCoord0);

                lowp vec4 tapOverlay =
                    color * step(circleX*circleX + circleY*circleY, radius*radius);
                gl_FragColor = (color + tapOverlay) * qt_Opacity;
            }
        "

        function touchStart(x, y) {
            normTouchPos = Qt.point(x / width, y / height)
            touchStartAnimation.start()
        }

        function touchStop() {
            touchStartAnimation.stop()
        }
    }

    MouseArea{
        id: touch
        anchors.fill: parent
        onPressed: {
            shaderEffect1.touchStop()
            shaderEffect1.touchStart(mouseX, mouseY)
        }
        onClicked: {
            parent.clicked()
            shaderEffect1.spread = 0
        }
        onExited: {
            shaderEffect1.spread = 0
        }
    }
}


다음은 구현된 MyButton을 사용하는 방법이다.

main.qml

import QtQuick 2.2
import QtQuick.Window 2.2
import QtQuick.Layouts 1.3

Window {
    visible: true
    width: 320
    height: 240
    title: qsTr("ShaderEffect Custom Button")

    ColumnLayout{
        anchors.centerIn: parent
        spacing: 10

        MyButton{
            width: 100
            height: 100
            radius: 50
            Layout.alignment: Qt.AlignHCenter

            Text {
                id: button0_text
                anchors.centerIn: parent
                text: qsTr("Hello")
                font.pixelSize: 15
            }

            onClicked: {
                if(button0_text.text == "Hello")
                    button0_text.text = "OK"
                else{
                    button0_text.text = "Hello"
                }
            }
        }

        MyButton{
            width: 100
            height: 50
            Layout.alignment: Qt.AlignHCenter

            Text {
                id: button1_text
                anchors.centerIn: parent
                text: qsTr("MyButton")
                font.bold: true
            }

            onClicked: {
                if(button1_text.text == "MyButton")
                    button1_text.text = "Makersweb.net"
                else{
                    button1_text.text = "MyButton"
                }
            }
        }
    }
}


번호 제목 글쓴이 날짜 조회 수
공지 Qt프로그래밍(QtQuick) Beginner를 위한 글 읽는 순서 운영자 2019.01.05 86181
79 OpenGL 렌더링을 QtQuick과 통합하는 방법 file makersweb 2019.10.01 2190
78 Qt Creator에서 임베디드 장치로 deploy설정(Custom Process Step) file makersweb 2019.06.15 2206
77 main함수 명령줄 옵션 해석 makersweb 2020.09.01 2247
76 QOpenVirtualkeyboard(Qt 5용 한글 및 영문, 숫자 가상키보드) file makersweb 2019.11.27 2251
75 [Qt News] Qt6 Git 개발 초기 단계 시작하기 j2doll 2019.08.02 2337
74 QtWayland와 ivi-compositor file makersweb 2018.12.27 2413
73 리눅스에서 Qt4.8기반 어플리케이션의 한글입력 file makersweb 2018.11.29 2452
72 Qt3D의 QML 타입으로 3D렌더링 file makersweb 2019.11.20 2536
71 구글 클라우드 Speech-To-Text API를 Qt기반(C++, Qml)테스트 [7] file makersweb 2019.01.20 2624
70 Qt5기반 독립 프로세스(out-of-process)로 동작하는 가상키보드(virtual keyboard) file makersweb 2019.02.24 2632
69 QML에서 멀티 스레드(multithreading) 프로그래밍 file makersweb 2019.05.25 2673
68 UI 폼(Form)작성 시 탭 순서(Tab Order) 설정 file makersweb 2020.08.24 2812
67 컨테이너 클래스 - QVector makersweb 2020.03.17 2869
66 QTextCodec클래스를 사용하여 유니코드와 EUC-KR 변환 makersweb 2019.03.25 2908
65 다국어 지원 어플리케이션 개발 file makersweb 2018.01.27 2986
64 QString 문자열에서 숫자만 추출해서 QString으로 반환 makersweb 2017.01.10 3078
63 qbs 사용 방법(Helloworld) file makersweb 2019.10.23 3095
62 QML 코딩 규칙 makersweb 2021.09.05 3276
61 임의의 메모리 영역(QImage)에 QPainter를 이용하여 그리기 file makersweb 2017.12.19 3462
60 QML, 이미지, 폰트등을 바이너리 리소스로 만들기 makersweb 2019.06.24 3525