한국어
Qt
 

ShaderEffect을 이용하면 다양한 그래픽효과를 구현할 수 있다. 이를 이용해서 버튼의 클릭 효과를 구현해본다.
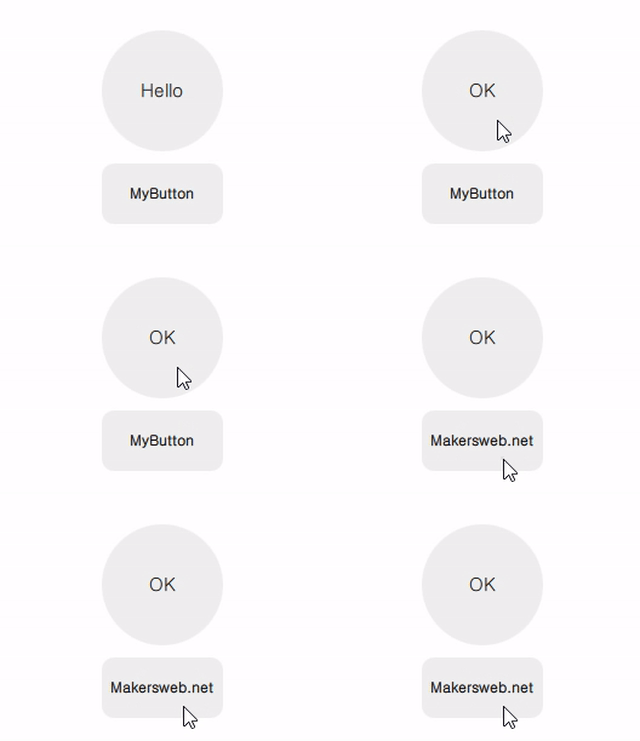
ShaderEffectQmlButton.gif


MyButton.qml

import QtQuick 2.2

Item{

    signal clicked()
    signal pressed()

    property alias radius: base.radius

    Rectangle{
        id: base

        radius: 10
        anchors.fill: parent
        color: "#10000000"
    }

    ShaderEffect {
        id: shaderEffect1
        opacity: 1
        anchors.fill: parent

        property variant source: effectSource

        ShaderEffectSource {
            id: effectSource
            sourceItem: base
            hideSource: true
        }

        property point normTouchPos
        property real widthToHeightRatio: height / width
        // animated uniform property
        property real spread: 0

        ParallelAnimation {
            id: touchStartAnimation
            UniformAnimator {
                uniform: "spread";
                target: shaderEffect1
                from: 0; to: 1
                duration: 300
                easing.type: Easing.InQuad
            }
            onStopped: {
                // animation stopped
                if(!touch.pressed){
                    if(shaderEffect1.spread != 0)
                        shaderEffect1.spread = 0
                }
            }
        }

        fragmentShader: "
            uniform sampler2D source;
            varying mediump vec2 qt_TexCoord0;
            uniform lowp float qt_Opacity;
            uniform mediump vec2 normTouchPos;
            uniform mediump float widthToHeightRatio;
            uniform mediump float spread;

            void main() {
                mediump float radius = (0.5 + abs(0.5 - normTouchPos.x)) * 1.0 * spread;
                mediump vec2 circleCenter =
                    normTouchPos + (vec2(0.5) - normTouchPos) * radius * 2.0;

                mediump float circleX = (qt_TexCoord0.x - circleCenter.x);
                mediump float circleY = (qt_TexCoord0.y - circleCenter.y) * widthToHeightRatio;

                highp vec4 color = texture2D(source, qt_TexCoord0);

                lowp vec4 tapOverlay =
                    color * step(circleX*circleX + circleY*circleY, radius*radius);
                gl_FragColor = (color + tapOverlay) * qt_Opacity;
            }
        "

        function touchStart(x, y) {
            normTouchPos = Qt.point(x / width, y / height)
            touchStartAnimation.start()
        }

        function touchStop() {
            touchStartAnimation.stop()
        }
    }

    MouseArea{
        id: touch
        anchors.fill: parent
        onPressed: {
            shaderEffect1.touchStop()
            shaderEffect1.touchStart(mouseX, mouseY)
        }
        onClicked: {
            parent.clicked()
            shaderEffect1.spread = 0
        }
        onExited: {
            shaderEffect1.spread = 0
        }
    }
}


다음은 구현된 MyButton을 사용하는 방법이다.

main.qml

import QtQuick 2.2
import QtQuick.Window 2.2
import QtQuick.Layouts 1.3

Window {
    visible: true
    width: 320
    height: 240
    title: qsTr("ShaderEffect Custom Button")

    ColumnLayout{
        anchors.centerIn: parent
        spacing: 10

        MyButton{
            width: 100
            height: 100
            radius: 50
            Layout.alignment: Qt.AlignHCenter

            Text {
                id: button0_text
                anchors.centerIn: parent
                text: qsTr("Hello")
                font.pixelSize: 15
            }

            onClicked: {
                if(button0_text.text == "Hello")
                    button0_text.text = "OK"
                else{
                    button0_text.text = "Hello"
                }
            }
        }

        MyButton{
            width: 100
            height: 50
            Layout.alignment: Qt.AlignHCenter

            Text {
                id: button1_text
                anchors.centerIn: parent
                text: qsTr("MyButton")
                font.bold: true
            }

            onClicked: {
                if(button1_text.text == "MyButton")
                    button1_text.text = "Makersweb.net"
                else{
                    button1_text.text = "MyButton"
                }
            }
        }
    }
}


번호 제목 글쓴이 날짜 조회 수
공지 Qt프로그래밍(QtQuick) Beginner를 위한 글 읽는 순서 운영자 2019.01.05 85850
178 가상키보드(Qt Virtual Keyboard)를 사용하는 방법 [32] file makersweb 2019.05.03 220981
177 콘솔에서 사용자 입력받기 file makersweb 2020.03.22 51844
176 QString 문자열 다루기 예제 운영자 2019.01.26 40048
175 Windows에서 Qt 설치 따라하기 file makersweb 2019.10.14 30870
174 Qt의 시그널 슬롯 시스템 file makersweb 2015.10.20 23578
173 QThread 소개 및 예제 makersweb 2019.12.25 19440
172 QtCreator Design으로 GUI만들기 (QML로 만드는 Hello World -2) [1] file makersweb 2019.05.26 14867
171 초보자를 위한 첫번째 프로젝트 - QML로 만드는 Hello World file makersweb 2018.03.16 14446
170 Qt 프로그래밍의 시작 makersweb 2015.10.25 14364
169 Qml과 C++로 구현하는 GUI어플리케이션 file makersweb 2018.12.25 13936
168 QML과 QtQuick 모듈 개념과 기본 타입들 makersweb 2019.04.26 13388
167 Windows에서 라즈베리파이3용 Qt5.10.0 크로스컴파일 [20] file makersweb 2018.02.23 12921
166 Qt의 오픈소스 라이센스 소개 file makersweb 2019.12.15 12549
165 Qml 기본 컴포넌트 강좌 (1) file makersweb 2019.01.03 12059
164 QtSerialPort를 사용한 시리얼(Serial)통신 [3] makersweb 2019.05.21 11890
163 Qt Installer Framework - 패키징, 설치프로그램 제작 file makersweb 2018.10.14 11662
162 Qt 응용프로그램 배포(windows) file makersweb 2018.10.10 11310
161 Ubuntu Linux에서 Qt Creator 설치 file makersweb 2016.03.06 10667
160 Qt의 스레드간 시그널 슬롯의 커넥션타입 [1] makersweb 2015.10.24 10167
159 Qt애플리케이션 객체(QCoreApplication, QGuiApplication, QApplication) 에 대해서 makersweb 2019.11.11 10088