한국어
Qt
 

QML and Qt Quick OpacityMask 예제

makersweb 2023.01.26 21:03 조회 수 : 769

OpacityMask을 사용하면 소스 아이템을 다른 아이템으로 마스킹할 수 있다.

import QtQuick
import QtQuick.Window
import Qt5Compat.GraphicalEffects

Window {
    visible: true
    width: 500
    height: 400
    title: qsTr("QtQuick GraphicalEffects")

    Rectangle {
        id: area
        anchors.fill: parent
        color: "white"

        Rectangle {
            id: punchHole
            width: 400
            height: 300

            anchors.centerIn: parent

            color: "yellowgreen"

            layer.enabled: true
            layer.effect: OpacityMask{
                maskSource: Rectangle {
                    width: punchHole.width
                    height: punchHole.height
                    radius: 15
                }
            }

            /* Internel Content */
            Text {
                font.pixelSize: 20
                text: qsTr("This property allows the effect output pixels to be cached \n in order to improve the rendering performance.")
                anchors.centerIn: parent
                color: "black"
                horizontalAlignment: Text.AlignHCenter
            }
        }
    }
}
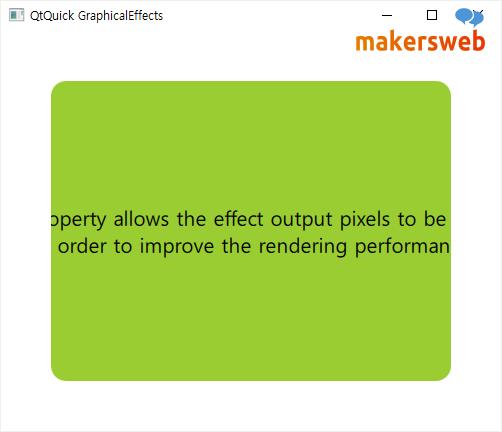
 

OpacityMask.png


다음과 같은 이미지를 넣어보자.

sky.jpg

단지 Image 아이템을 사용하고 source를 지정하면 된다.

import QtQuick
import QtQuick.Window
import Qt5Compat.GraphicalEffects

Window {
    visible: true
    width: 500
    height: 400
    title: qsTr("QtQuick GraphicalEffects")

    Rectangle {
        id: area
        anchors.fill: parent
        color: "white"

        Image {
            id: punchHole
            width: 400
            height: 300

            anchors.centerIn: parent

            source: "qrc:/sky.jpg"

            layer.enabled: true
            layer.effect: OpacityMask{
                maskSource: Rectangle {
                    width: punchHole.width
                    height: punchHole.height
                    radius: 15
                }
            }

            /* Internel Content */
            Text {
                font.pixelSize: 20
                text: qsTr("This property allows the effect output pixels to be cached \n in order to improve the rendering performance.")
                anchors.centerIn: parent
                color: "greenyellow"
                horizontalAlignment: Text.AlignHCenter
            }
        }
    }
}
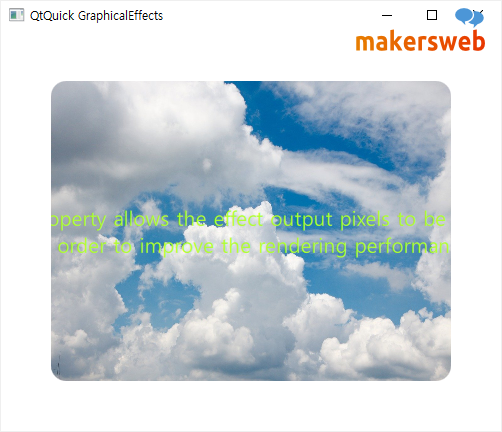
 

OpacityMask1.png

번호 제목 글쓴이 날짜 조회 수
공지 Qt프로그래밍(QtQuick) Beginner를 위한 글 읽는 순서 운영자 2019.01.05 86944
19 Qt의 스레드간 시그널 슬롯의 커넥션타입 [1] makersweb 2015.10.24 10369
18 Ubuntu Linux에서 Qt Creator 설치 file makersweb 2016.03.06 10751
17 Qt 응용프로그램 배포(windows) file makersweb 2018.10.10 11612
16 Qt Installer Framework - 패키징, 설치프로그램 제작 file makersweb 2018.10.14 11833
15 QtSerialPort를 사용한 시리얼(Serial)통신 [3] makersweb 2019.05.21 12258
14 Qml 기본 컴포넌트 강좌 (1) file makersweb 2019.01.03 12281
13 Qt의 오픈소스 라이센스 소개 file makersweb 2019.12.15 12852
12 Windows에서 라즈베리파이3용 Qt5.10.0 크로스컴파일 [20] file makersweb 2018.02.23 13283
11 QML과 QtQuick 모듈 개념과 기본 타입들 makersweb 2019.04.26 13555
10 Qml과 C++로 구현하는 GUI어플리케이션 file makersweb 2018.12.25 14243
9 Qt 프로그래밍의 시작 makersweb 2015.10.25 14509
8 초보자를 위한 첫번째 프로젝트 - QML로 만드는 Hello World file makersweb 2018.03.16 14681
7 QtCreator Design으로 GUI만들기 (QML로 만드는 Hello World -2) [1] file makersweb 2019.05.26 15190
6 QThread 소개 및 예제 makersweb 2019.12.25 19915
5 Qt의 시그널 슬롯 시스템 file makersweb 2015.10.20 23926
4 Windows에서 Qt 설치 따라하기 file makersweb 2019.10.14 31102
3 QString 문자열 다루기 예제 운영자 2019.01.26 41038
2 콘솔에서 사용자 입력받기 file makersweb 2020.03.22 51928
1 가상키보드(Qt Virtual Keyboard)를 사용하는 방법 [32] file makersweb 2019.05.03 223174