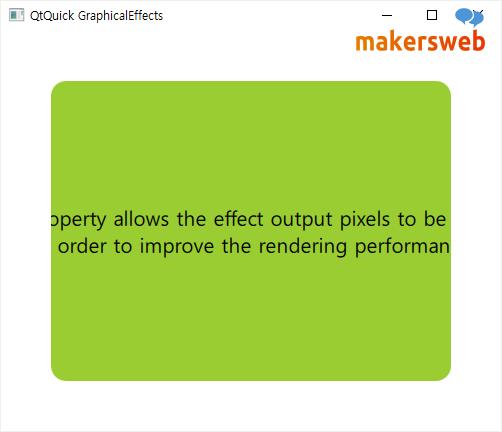
OpacityMask을 사용하면 소스 아이템을 다른 아이템으로 마스킹할 수 있다.
import QtQuick
import QtQuick.Window
import Qt5Compat.GraphicalEffects

Window {
    visible: true
    width: 500
    height: 400
    title: qsTr("QtQuick GraphicalEffects")

    Rectangle {
        id: area
        anchors.fill: parent
        color: "white"

        Rectangle {
            id: punchHole
            width: 400
            height: 300

            anchors.centerIn: parent

            color: "yellowgreen"

            layer.enabled: true
            layer.effect: OpacityMask{
                maskSource: Rectangle {
                    width: punchHole.width
                    height: punchHole.height
                    radius: 15
                }
            }

            /* Internel Content */
            Text {
                font.pixelSize: 20
                text: qsTr("This property allows the effect output pixels to be cached \n in order to improve the rendering performance.")
                anchors.centerIn: parent
                color: "black"
                horizontalAlignment: Text.AlignHCenter
            }
        }
    }
}
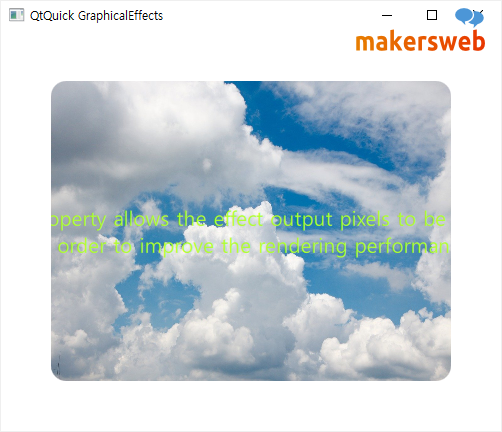
다음과 같은 이미지를 넣어보자.

단지 Image 아이템을 사용하고 source를 지정하면 된다.
import QtQuick
import QtQuick.Window
import Qt5Compat.GraphicalEffects

Window {
    visible: true
    width: 500
    height: 400
    title: qsTr("QtQuick GraphicalEffects")

    Rectangle {
        id: area
        anchors.fill: parent
        color: "white"

        Image {
            id: punchHole
            width: 400
            height: 300

            anchors.centerIn: parent

            source: "qrc:/sky.jpg"

            layer.enabled: true
            layer.effect: OpacityMask{
                maskSource: Rectangle {
                    width: punchHole.width
                    height: punchHole.height
                    radius: 15
                }
            }

            /* Internel Content */
            Text {
                font.pixelSize: 20
                text: qsTr("This property allows the effect output pixels to be cached \n in order to improve the rendering performance.")
                anchors.centerIn: parent
                color: "greenyellow"
                horizontalAlignment: Text.AlignHCenter
            }
        }
    }
}